Getting started with Fitbit development - Part II: Creating a Clock Face, Fitbit OS Simulator, running the app on an actual device

In this second part, we are going to create a clock face in Fitbit. Then we are going to run it on the Fitbit OS Simulator and finish running it on an actual device through the feature called Developer Bridge.
Clock faces are the easiest thing you can build on Fitbit. It takes some knowledge on SVG and JavaScript, but it is not as complex as building an entire framework. Also, you need to learn a thing or two about the Fitbit API.
Create a new project
First, let’s scaffold a new clock face project. Run the following command in the Command Prompt:
npx create-fitbit-app my-first-clock-face
This will take you through a few simple questions to generate the minimal scaffolding required for either an app or clock face:
- “What type of application should be created?”. Choose the
clockfaceoption. - “What should the name of this application be?”. You can keep default, or rename it to something else.
- “Should this application contain a companion component?”. Choose “n” (no).
- “Which platforms should this application be built for?”. If you have a Fitbit device, choose the one corresponding to its OS version, otherwise keep default.
Note: The latest SDK supports only the Fitbit OS 5 devices (Versa 3 and Sense). If you have an older device and want to run your app on it, try creating a new Fitbit app by specifying an older SDK version.
npx create-fitbit-app --sdk-version 4.1.0 my-first-clock-face
The SDK 4.1.0. supports the OS version 4. See create-fitbit-app - npm (npmjs.com) for more information.
Now you can open the generated folder with Visual Studio Code.
Take a time to tour around the generated folders and files.
A tour in the scaffolded files and folders
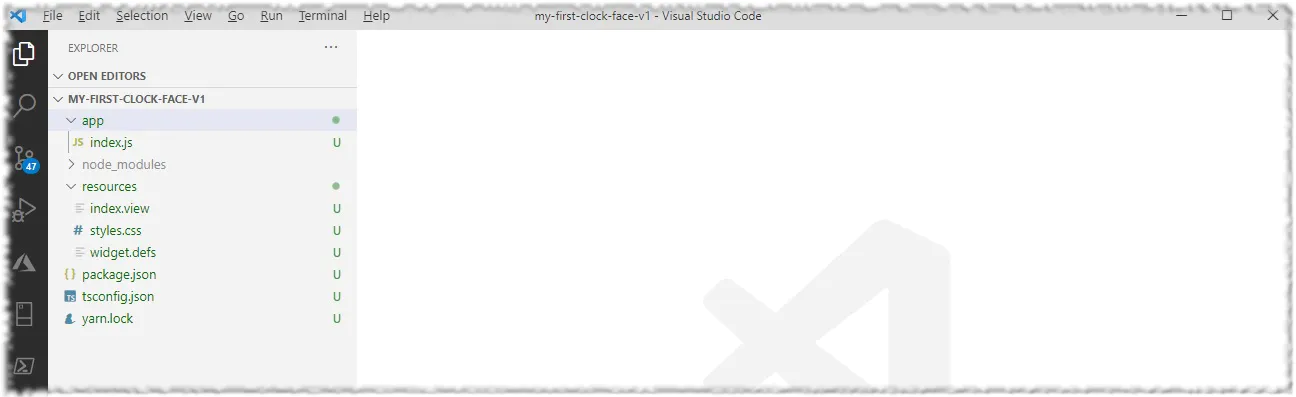
The /app folder
This folder contains the application logic which executes on the Fitbit device. Here you will add the JavaScript to interact directly with the presentation layer, communicate with the companion, or read and write settings.
Companion provides additional features which exists within the Fitbit mobile application. Some common cases are: communicating with Web APIs, utilize mobile device GPS sensor, perform functions whilst the device application is not active, data persistence, among others.
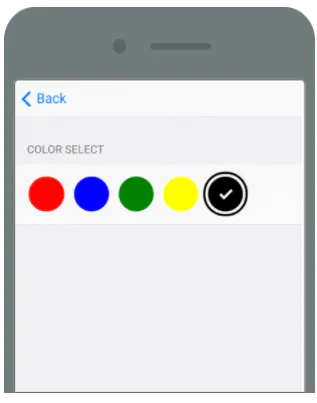
The application can be made configurable by users, by creating an settings definition file which uses the Settings API . Users can configure an application within the Fitbit mobile application on their phone. A common usages is choosing the color of the clock face.
In this post, we are not going to use the companion nor the settings.
The /resources folder
All the resources which are bundled with the application during the build process are in this folder.
In the /resources/index.view file you have the main Fitbit SVG file where the application user interface markup is defined. In older SDK versions, this file has the .gui extension.
The /resources/widget.defs is a SVG file that controls which system widgets are available for use within the index.view file. There are a number of predefined SVG components available - called system widgets - to simplify the development process and create rich user interfaces. These components are Button, Views, Text, and others. In older SDK versions, this file has the .gui extension.
Next, in the /resources/styles.css file is where you add your styles in this file and include it in the application by creating a <link> in the index.view file.
You can add .png and .jpg files to the /resource folder and reference them using the <image> tag in the index.view.
On the date of this blog post, embedding custom fonts is not supported. The official documentation recommends using a library like fitfont to generate images of each character.
The package.json file
This is the manifest file of your application.
It contains the default NodeJs section with the following fields:
- other packages your project depends on
- package's name
- the "version" of your application
- license
- scripts to build and debug your application
Additionally, it contains a fitbit section with the following fields:
appUUID: this is a GUID that uniquely identifies your app.appType: this defined whether your app is a clockface or an application.appDisplayName: the display name of the app in the Fitbit device.iconFile: here you define a icon for your app.wipeColor: this will define the background color of your clock face.requestedPermissions: similar to mobile device applications, here you’ll have a list of features your application requests permissions. Some examples are: tracking exercises, run in background, access to internet, listen to heart rate, among others.buildTarges: here’s the device operational system your application will be compatible with. You can learn more about the Fitbit build targets, see Multiple Devices Guide (fitbit.com).
Let’s start by working on our clock interface.
The clock Interface
The user interface in a Fitbit application is drawn with SVG files. To learn more about the SVG markup supported by the Fitbit rendering engine, please refer to SVG Guide (fitbit.com).
Add to the /resources folder the image landscape.png.
In the index.view add the following SVG markup.
<svg>
  <rect id="background" />
  <image href="landscape.png"/>
  <text id="txtTime" class="clock-text">13:37:20</text>
  <rect class="divider divider-top" />
  <text id="txtDate" class="date-text">MON JANUARY 01</text>
</svg>
Let’s build and install our latest changes.
Make sure the Fitbit OS Simulator is running and enter the following command in the Visual Studio Code terminal to connect to the Fitbit interactive shell:
npx fitbit
Once in the Fitbit interactive shell, type bi and press enter.
fitbit$ bi
Thebicommand is a shortcut for the two commands:buildandinstall. Also, you don't type the$fitbitpart. I added it in the examples to indicate when you must run the command from the Fitbit shell.
You should see the following in the Fitbit OS Simulator:
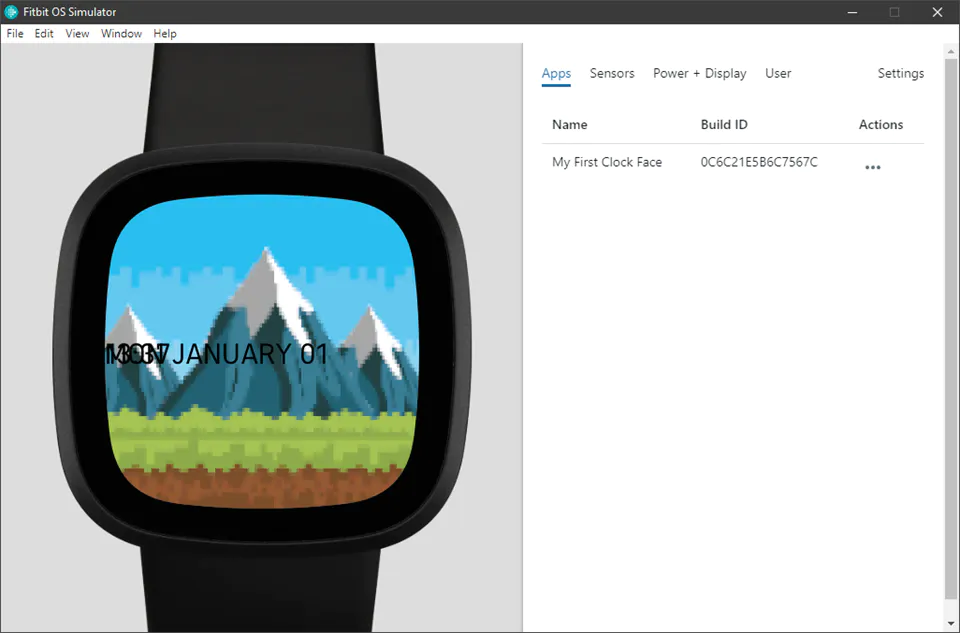
Yuck! That doesn’t look nice, let’s fix this broken style.
Styling in Fitbit
In the /resource/styles.css file, add the following markup:
#background {
  x: 0;
  y: 0;
  width: 100%;
  height: 100%;
  fill: #000000;
}

.clock-text {
  font-family: System-Bold;
  text-anchor: middle;
  text-length: 32;
  x: 50%;
  y: 50%-25;
  width: 100%;
  height: 100%;
  fill: chocolate;
  font-size: 80;
  line-increment: 100;
  font-weight: bold;
}

.date-text {
  font-family: Seville;
  font-size: 26;
  text-anchor: middle;
  text-length: 32;
  x: 50%;
  y: 50%+39;
  width: 100%;
  height: 100%;
  fill: #ffffff;
}

.divider {
  x: 50%-111;
  width: 222;
  height: 1;
  fill: #646464;
}

.divider-top {
  y: 50%;
}
The Fitbit rendering engine supports most of the traditional web CSS, but it has some limitations. For instance, you don’t specify units for font-size, letter-spacing. You use font-size: 120; not font-size: 120px;. These limitations are well documented in CSS Guide (fitbit.com).
Since we are styling SVG, there are only certain attributes that can be applied as CSS to SVG. For example, to change the color of an element, we use the fill property in CSS. I recommend reading SVG Properties and CSS | CSS-Tricks for more information.
Now repeat the procedure described above to build and install our latest changes. If you are already connected to the Fitbit interactive shell, just type bi and press enter.

Ah, that looks much better. But the clock is not ticking, though.
Let’s fix that.
Adding some application logic
In the index.js file, add the following import statements:
import clock from "clock";
import document from "document";
We started by importing the Clock API. This API provides functionality related to the real-time clock of the Fitbit device. It comes with a tick event that returns a JavaScript Date object with the current date and time. It also has a property called granularity that allows us to determine the precision we want the tick event to be emitted. The supported options are off, hours, minutes and seconds.
Below is an example of the Clock API in use:
import clock from "clock";

clock.granularity = "minutes"; // seconds, minutes, or hours

clock.addEventListener("tick", (evt) => {
  // tick every minute
});
Next, we imported the Document API. This API provides us functionality to interact with the clock interface, or to be more precise, the current view. It has methods very similar to the Javascript document interface, such as getElementById, getElementsByClassName and getElementsByTagName.
Now, back to the index.js file, add the following code:
import clock from "clock";
import document from "document";

let txtTime = document.getElementById("txtTime");
let txtDate = document.getElementById("txtDate");

clock.granularity = "seconds";
clock.addEventListener("tick", tickHandler);

function tickHandler(evt) {
  // Some code here
}
In the code above, you can see that we basically:
- stored the SVG text components that holds the time and date in the variables
txtTimeandtxtDate. - set the granularity level to “seconds” since our clock face displays the seconds.
- attached an event listener named
tickHandlerto the clock event namedtick.
Let’s continue with our code. We will add a constant to store the abbreviated months name (3 letters) and a helper method to pad zeroes to the time numbers.
After the tickHandler function, add the following code:
function zeroPad(i) {
  if (i < 10) {
    i = "0" + i;
  }
  return i;
}

const monthsShort = [
  "JAN",
  "FEB",
  "MAR",
  "APR",
  "MAY",
  "JUN",
  "JUL",
  "AUG",
  "SEP",
  "OCT",
  "NOV",
  "DEC",
];
Finally, let’s add the code to update the clock time and date:
function tickHandler(evt) {
  let today = evt.date;

  let fullYear = today.getFullYear();
  let monthNameShort = monthsShort[today.getMonth()];
  let dayNumber = today.getDate();

  let hours = zeroPad(today.getHours());
  let mins = zeroPad(today.getMinutes());
  let seconds = zeroPad(today.getSeconds());

  let timeString = `${hours}:${mins}:${seconds}`;
  let dateString = `${dayNumber} ${monthNameShort} ${fullYear}`;

  txtTime.text = timeString;
  txtDate.text = dateString;
}
You can see the complete code of the index.js in my Github repository.
There’s not much to comment about the code other than:
- the tick event returns a standard JavaScript Date object.
- if you want to learn more, please refer to the official documentation Clock API (fitbit.com).
Now repeat the procedure to build and install our latest changes .If you are already connected to the Fitbit interactive shell, just type bi and press enter. You should see the clock app in the Fitbit OS Simulator updating the date and time at the seconds precision.
Testing the app on your own Fitbit device
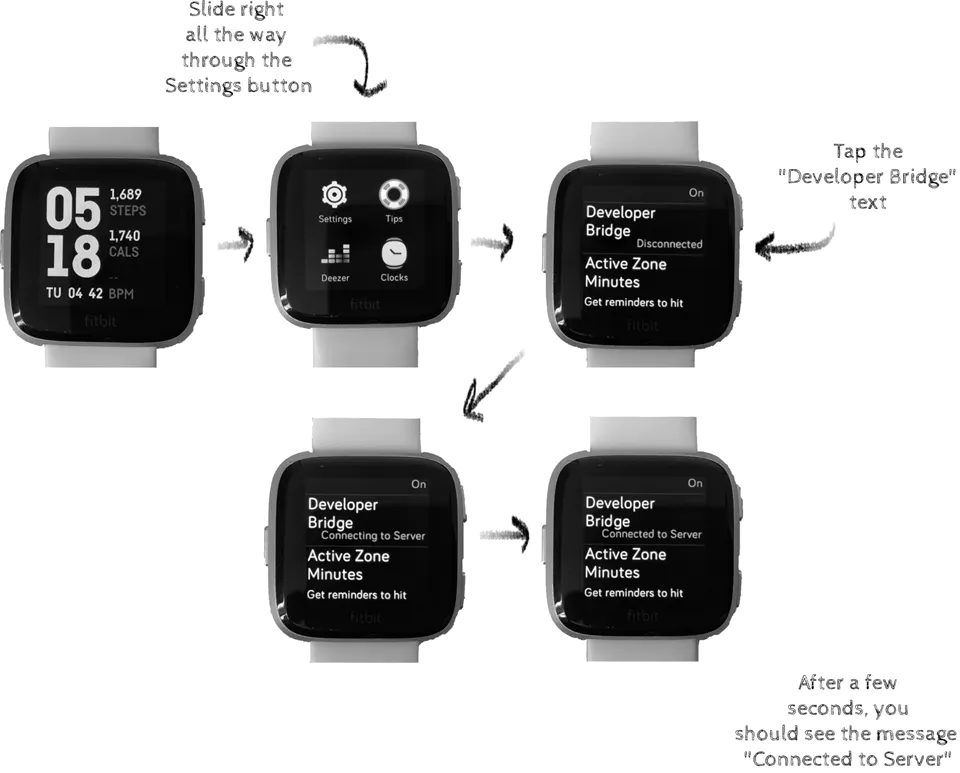
If you own a Fitbit device and want to test the on it, having your app running on your device is pretty simple. First, we need to enable developer bridge.
In the Fitbit device, go to Settings > and tap Developer Bridge.
You should see the message going from “Disconnected” to “Connecting to Server” until it stops at “Connected to Server.
Now, back to the Visual Studio Code terminal, enter the following commands:
npx fitbit
you are already connected to the Fitbit interactive shell, you should exit it by typing exit and pressing enter.Once connected to the Fitbit interactive shell, enter the following:
$fitbit connect device
You’ll be presented with the question “Which device do you wish to sideload to?” and the options should be “Versa” (or the name that matches your current device) or “Versa Simulator”. Choose “Versa”.
Finally, type the bi command and press enter.
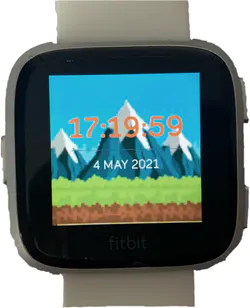
The app should be installed on your device:
Conclusion
That was it for this second part where we covered a lot about clock faces. A quick recap: we scaffolded a new clock face project, added a image, updated the interface using SVG markup, applied some CSS styles to improve its look and feel and finally added some logic to make the clock face update according as the clock ticks at the seconds precision.
Coming next we are going learn about the companion API, store some settings and much more.
Credits
- The background image was downloaded from Vintage vector created by stockgiu - www.freepik.com
- Parts of the
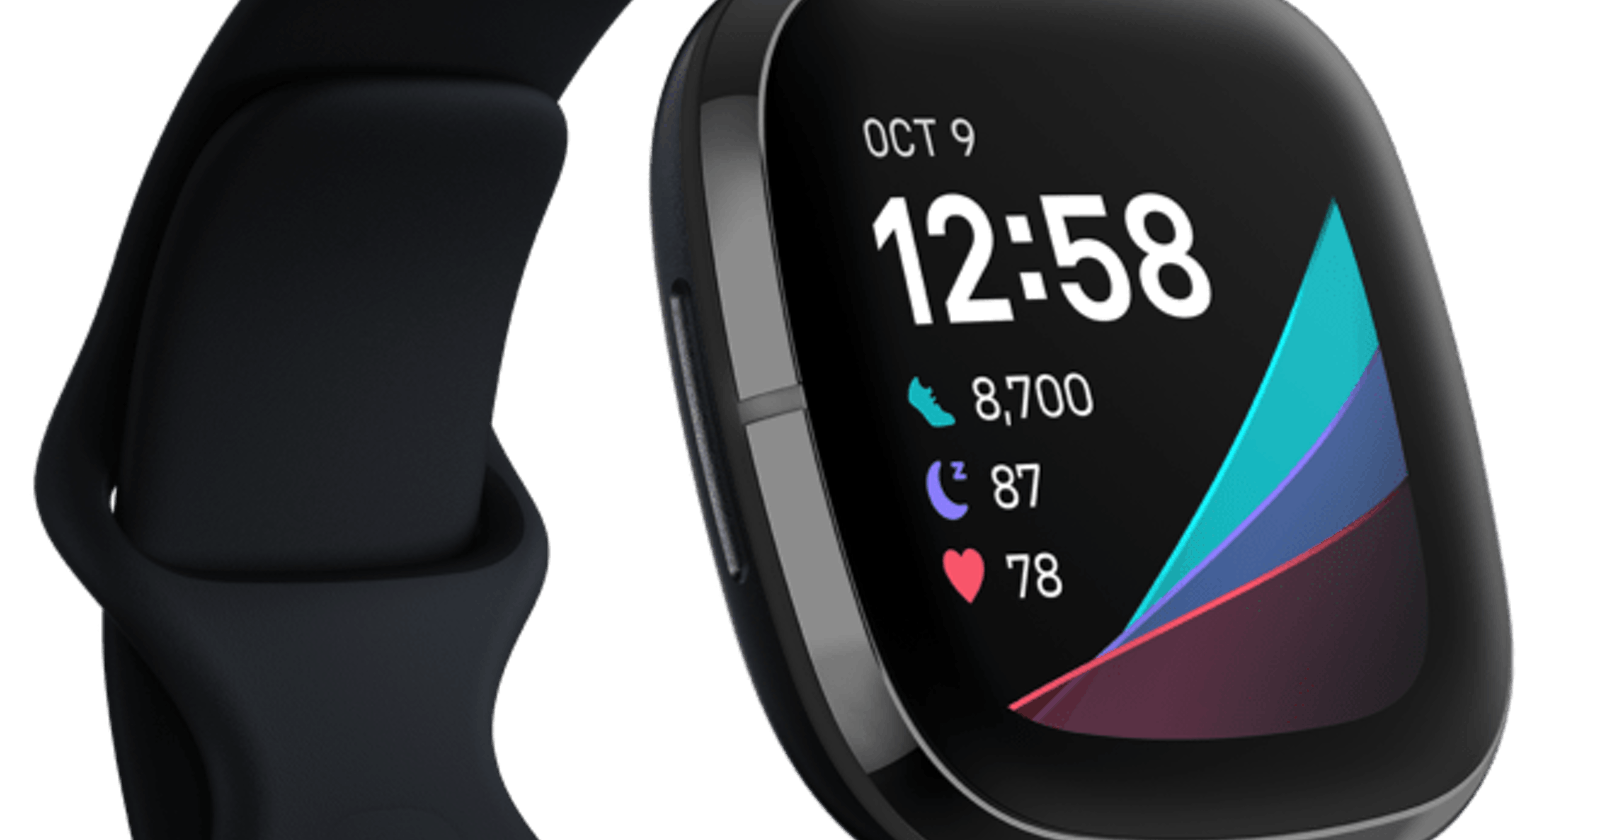
index.jscode were copied from https://github.com/Fitbit/sdk-moment. - Background image from the Official Fitbit website.

