Publishing Service: Scheduled publishing

Publishing Service enables you to schedule tasks through the task scheduler. It comes with the PublishTask and PublishJobCleanUpTask default tasks. The good news is that we can create custom scheduled tasks as well.
In this post, we are going to create a scheduled publishing task which on a given Interval queues a new publish job.
Update: Before we get started, the quickest way to add a scheduled publishing task is still by enabling the Sitecore.Tasks.PublishAgent agent. By default it is disabled. Just add to your CM instance a configuration file like the following:
The task scheduler is a service that manages the creation of tasks at startup as well as enabling the addition and execution of tasks at runtime. Publishing Service comes with some default scheduled tasks. These tasks are contained in the (PublishServiceInstallationPath)\config\sitecore\sc.publishing.tasks.xml configuration file.
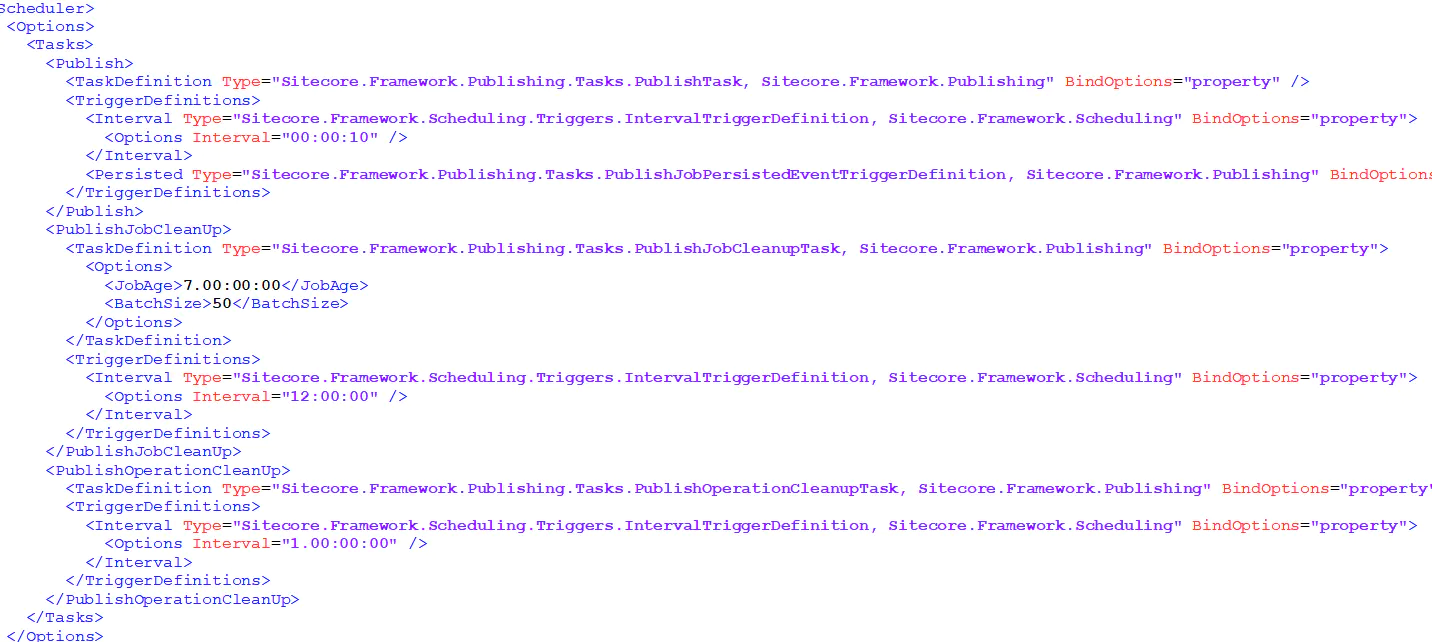
The PublishTask processes the next queued item in the publish queue.
- The
PublishJobCleanUpremoves any publishing jobs that are over a certain age. It also removes the jobs associated manifests and manifest results. PublishOperationCleanUpTaskremoves any publishing operations that have been processed and are no longer required.
What we are going to do is to create a scheduled task that will queue a publish job every 10 seconds.
Let’s start by creating a new ASP.NET MVC project using the ASP.NET Web Application (.NET Framework) template and selecting .NET Framework 4.5.2. Also, add a class and a XML configuration file, and add the Publishing Service references according to the image below.
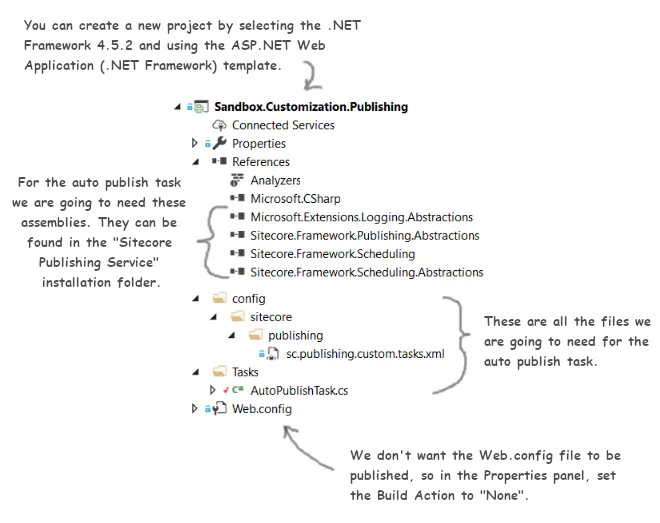
Also, I added a Post-build events that copies the bin\ folder to the Publishing Service installation folder.
XCopy /Y /E "$(TargetDir)*.*" "X:\inetpub\wwwroot\sandboxpublishingservice.dev.local\"
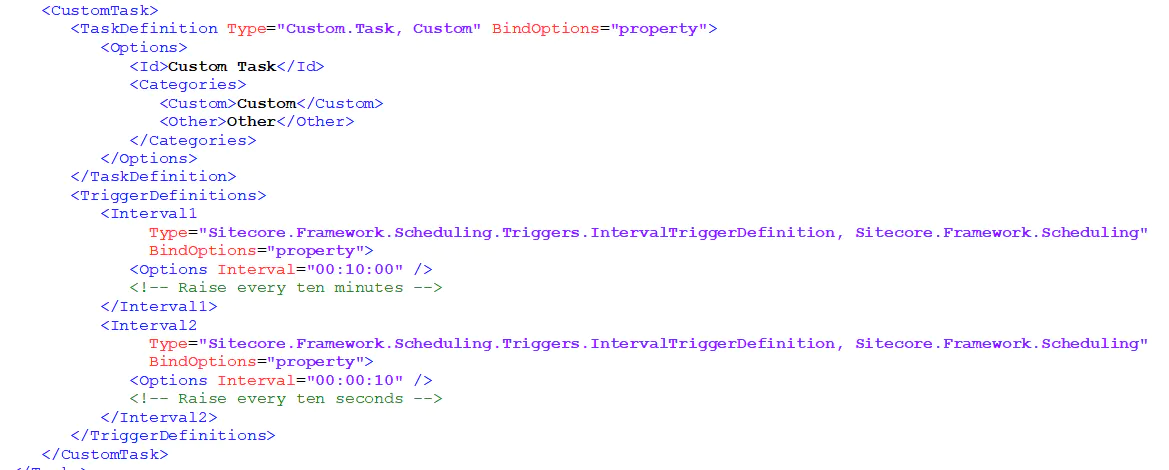
Next, we are going to update the sc.publishing.custom.tasks.xml configuration file we just created.
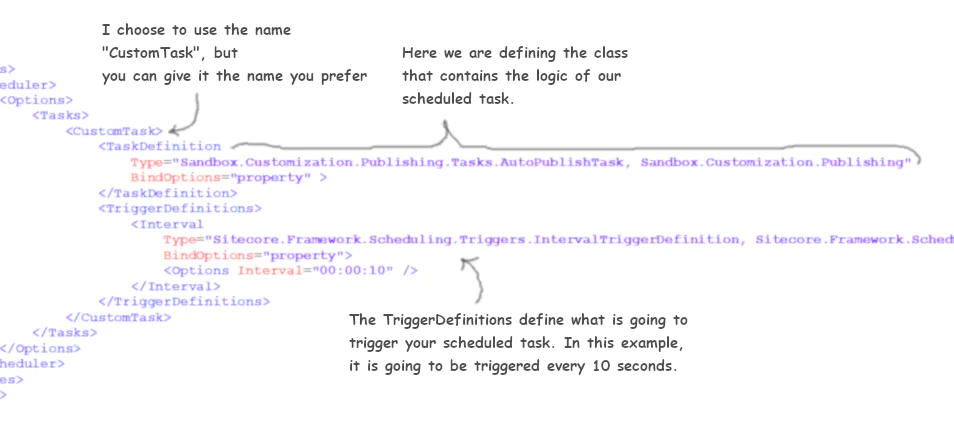
All custom tasks must be added after Settings/Sitecore/Publishing/Services/Scheduler/Options/Tasks node. You can name it however you prefer. In my example, I used /CustomTask node, but you can for example name it /AutoPublish and add as many custom tasks as you want.
Within our CustomTask node we defined the TaskDefinition node and the TriggerDefinition.
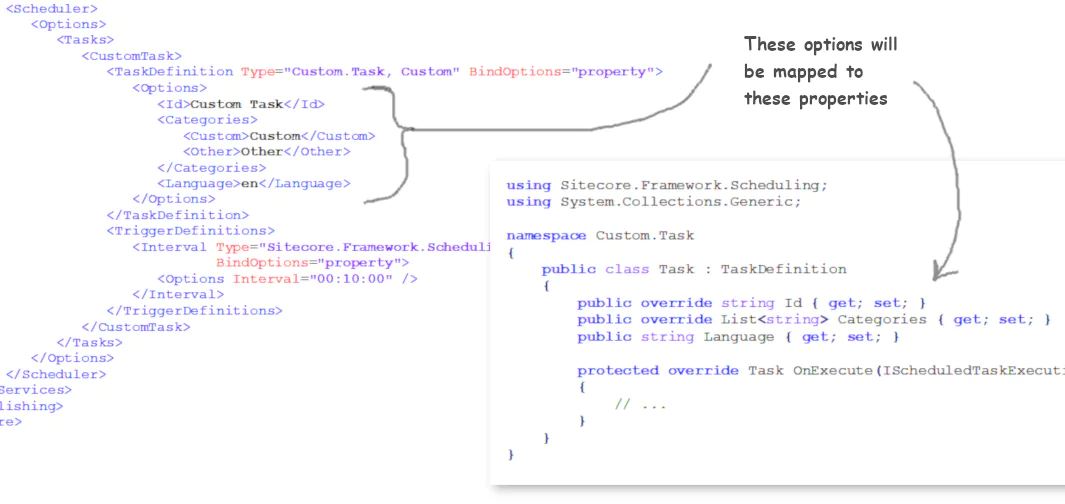
The TaskDefinition defines the class that contains the logic for your custom scheduled task. It also contains binding options so you can provide parameters in your configuration file that binds to properties in your class.
A task cannot run without triggers. You can register multiple triggers on the same task. e.g. two interval triggers that trigger a task at different polling intervals.
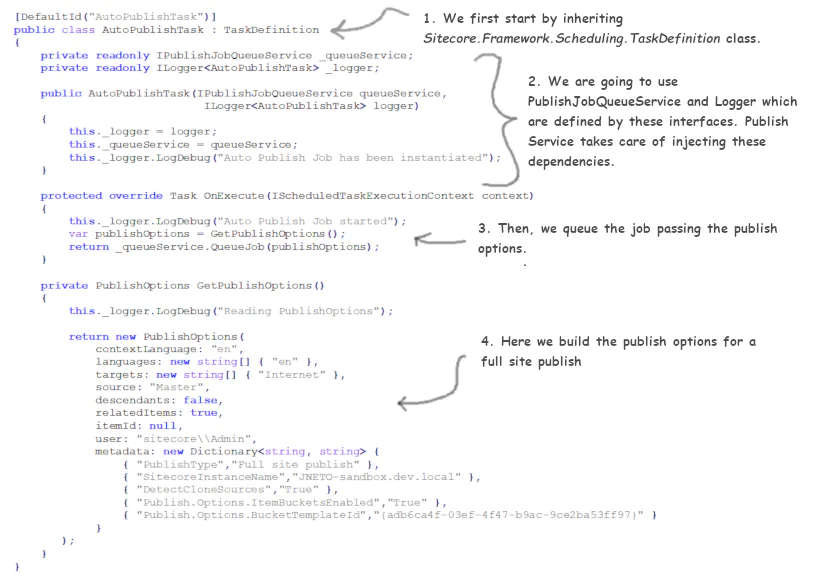
Now we are going to update the AutoPublishTask.cs file we created before.
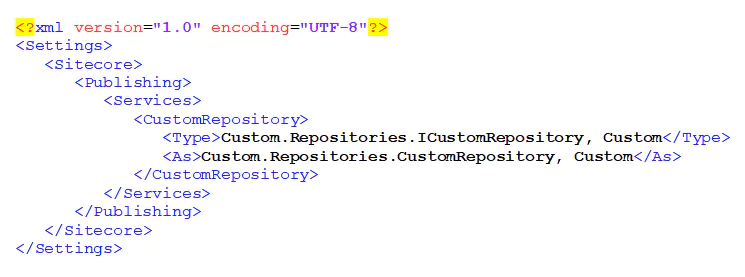
Publishing Service defines the dependencies (and their resolver) in the (PublishingServiceInstallationFolder)\config\sitecore\publishing\sc.publishing.services.xml configuration file. If you want to add a new dependency you can either change this configuration file (not recommended) or add a new XML configuration file to (PublishingServiceInstallationFolder)\config\sitecore\publishing folder and define the dependencies after Settings/Sitecore/Publishing/Services node.
Finally, publish your solution to the Publishing Service installation folder.
Make sure the your project’s assembly get copied to the root of the Publishing Service installation folder and that your configuration file gets published to \config\sitecore\publishing.
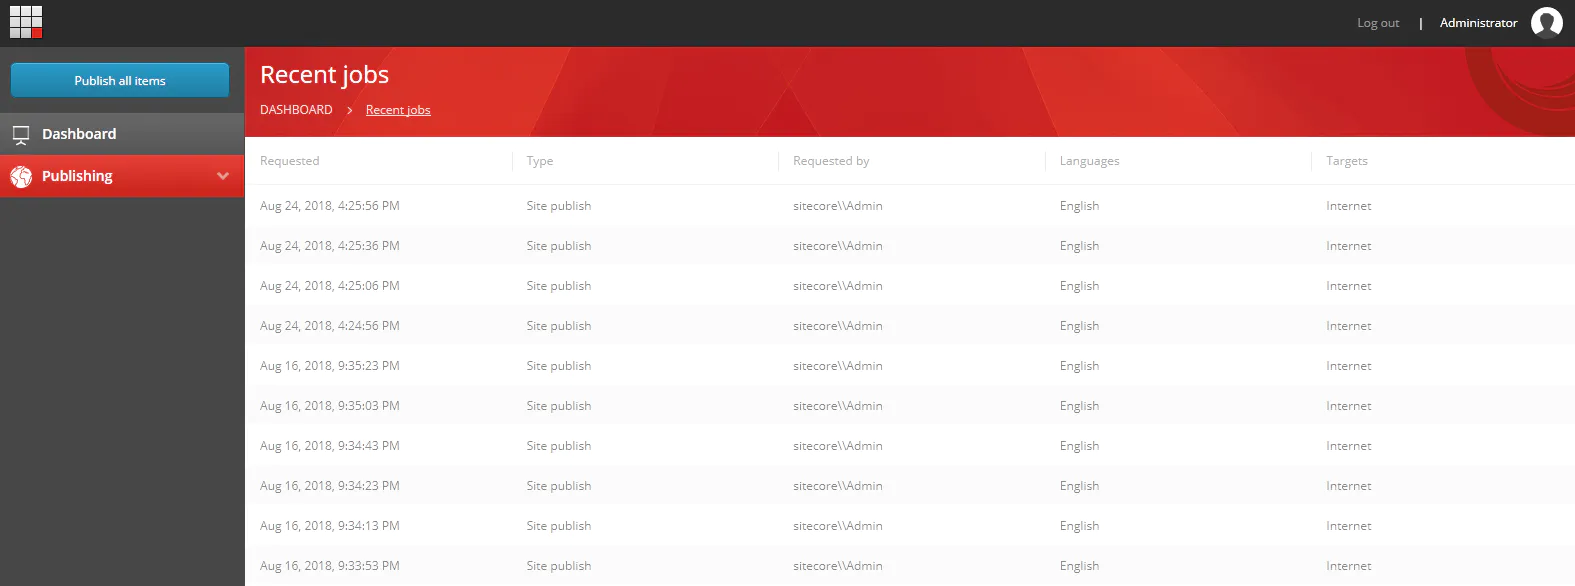
If you log in your Sitecore instance and open the Publishing Service Dashboard, you should see a publishing task job being added every (or nearly) 10 seconds.
You can find the complete code on my GitHub repository. There, I also implemented the binding of the auto publish task properties so the parameters are read from the XML configuration file.
Update – September 2, 2018
I thought it was important to mention that I set the publishing interval to 10 seconds just for the sake of local development and exemplification. You should never use such a short interval in a production environment.
comments powered by Disqus